How to Install a Toilet Flange?
The toilet flange, also known as the closet flange, is a crucial component that connects a toilet to the drain pipe under a bathroom floor. Made of materials such as PVC, rubber, copper, brass, stainless steel, or metal, the flange is secured with bolts or screws and anchored to the toilet with a wax ring and rubber gasket. In this article, we will discuss a toilet flange and provide step-by-step instructions on how to install a toilet flange.
How to Install a Toilet Flange?
Toilet flanges, or closet flanges, are pipe fittings that attach a commode to the drain pipe under a bathroom floor. Water closets, or closet flanges, are composed of PVC, rubber, copper, brass, stainless steel, or metal and are fastened into place with bolts or screws. The flange is secured to the base of the toilet with the help of a wax ring and a rubber gasket. This prevents the flange from coming loose from the bathroom and falling to the floor.
Here is the step-by-step guide on How to Install a Toilet Flange:
Step 1. Remove the Old Flange

The first thing to do is take off the old flange. Bolts holding the flange in place can be undone. A grinder may be required to remove the bolts if they are rusty or otherwise trapped.
The flange may be removed by pulling on it once the bolts have been removed. If firmly fastened, you can tighten it loose with a screwdriver or a putty knife.
Step 2. Take Off Your Old Wax Ring

The previous wax ring must be removed now that the flange has been eliminated. Using a putty knife, you can easily remove it. Get rid of the old wax so the new wax ring can stick.
Step 3. Cleaning the Site Around the Drain

After the wax ring has been eliminated, the area around the drain must be cleaned. Doing so will guarantee a secure fit for the replacement flange. To clean the site, use a brush and some soapy water. Use a wire brush attachment on a power drill to remove rust or buildup.
Step 4. Determine the Flange Diameter

After clearing the space, the flange’s dimensions may be considered. This will help you find a flange that fits your toilet. The standard size for flanges is 3 or 4 inches. A tape measure is needed to determine the diameter.
Step 5. Choose the Appropriate Flange Size

Knowing the flange’s diameter will help you choose the correct size. If you need clarification, contact an expert for advice on the extent of to purchase. If you want to replace your flange but need to figure out what size you need, bringing the old one can help. The previous flange should be clear of wax and another buildup before installation.
Step6. Place the Flange on the Toilet Surface

Now, You need to Install the new flange. The bolt holes in the flange must be lined up with those in the drain. Taking the distance from the wall into account is also essential.
Most flanges require around 12 inches between the mounting surface and the flange’s center. However, this may need to be modified dependent on the dimensions of your bathroom’s commode.
Step7. Drilling Holes in the Concrete for Screws

After the flange is set, holes must be drilled in the concrete to accommodate the screws. Use a concrete drill bit that is just a little smaller in diameter than the screws. The flange’s diameter determines how many screws are required. Four screws are often used to secure a flange.
Step8. Install Screws to Secure the Flange

After the holes have been exhausted, the screws may be put in. To secure them, you’ll need to use a screwdriver. Do not overtighten the screws or risk cracking the flange, causing a leaky toilet.
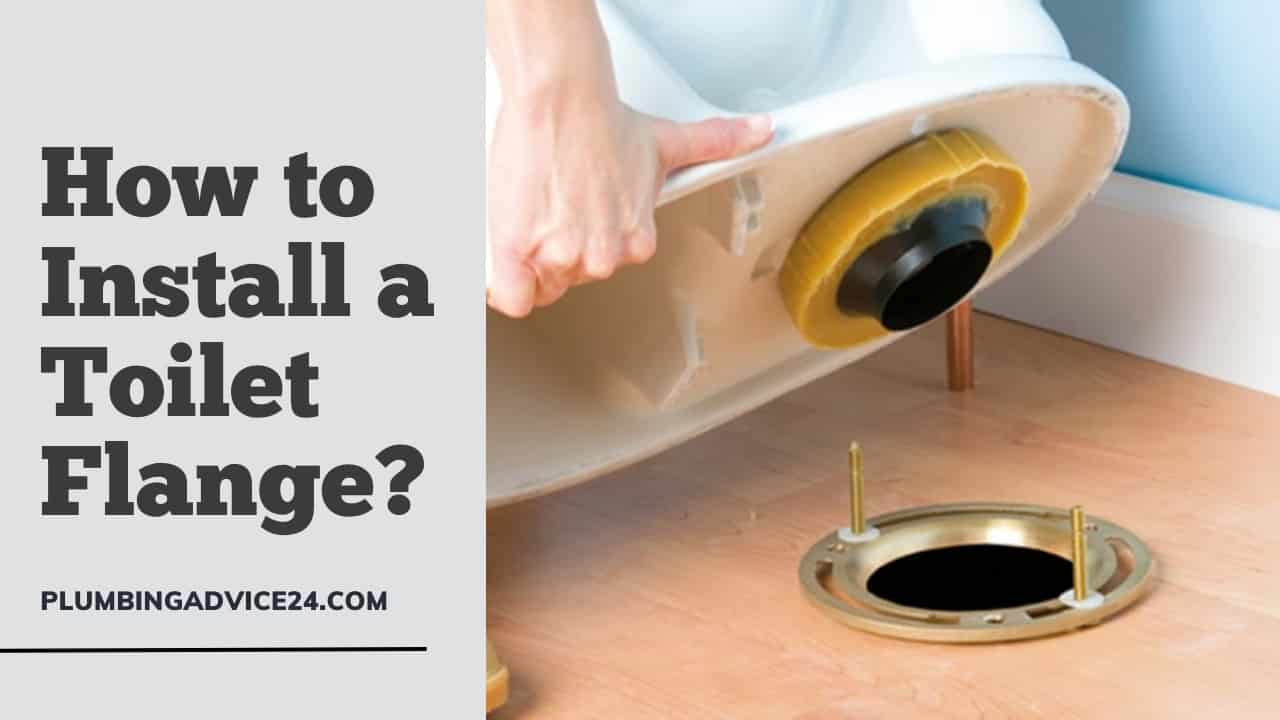
Step9. Insert the Wax Ring

The next step is to set the wax ring in place above the flange. The ring has to have a close fit over the flange. Contact a professional for guidance if you need assistance determining the proper wax ring size.
Step10. Install the Toilet Bowl onto the Flange

The toilet bowl may be installed on the wax ring at this point. The bolt holes must line up with the flange’s openings. After the bowl has been set into place, the bolts may be tightened.
Step11. Link the Water Line for the Test

The last step is to hook up the toilet’s water line. Connect the line to the tank’s bottom fitting by tightening it. After ensuring the line is secure, you may test for leaks by turning on the water supply and flushing the toilet. The task is finished if there are no water leaks. A toilet flange may now be used effectively.
Conclusion:-
A toilet flange installation is a simple task. Ensure that you measure the flange and choose the appropriate size. Also, remember that the screws should only be hand-tight; otherwise, the flange could come loose. To install your toilet flange or even your complete toilet, it is always preferable to consult an experienced plumber if you are unsure of your plumbing abilities. They have the skills to accomplish it swiftly and effectively, which may save you time and headaches.
Related Post : How to Properly Set Your Toilet Flange Height
How Long Does It Take to Replace a Toilet Flange?
The time it takes to replace a toilet flange can vary depending on the amount of damage and the skill level of the person performing the repair. However, on average, it usually takes around 1-2 hours to replace a toilet flange.
How to Install a Toilet Wax Ring?
Installing a toilet wax ring is a relatively simple process, and can be done in just a few steps:
- Place the wax ring on the toilet flange with the flat side facing up. Make sure the ring is centered on the flange.
- Lower the toilet bowl onto the wax ring, making sure the bolts on the base of the toilet are aligned with the holes on the flange.
- Press down firmly on the toilet to compress the wax ring. Tighten the nuts onto the bolts using a wrench, alternating between nuts to make sure the toilet is level.
How to Set a Toilet Wax Ring?
A wax ring is set in place above the flange. The ring should fit snugly over the flange. If you need help determining the right wax ring size, consult a professional for guidance.
Does the Toilet Flange Go on Top of the Tile?
The toilet flange should be installed on top of the finished floor and below the toilet. But if you are installing a new toilet on a tile floor, the flange should be installed on top of the tile. This ensures that the flange is level with the finished floor and creates a proper seal between the toilet and the drain pipe.
How to Install Toilet Flange Bolts?
Toilet flange bolts are used to secure the toilet bowl to the flange, which is mounted on the floor. Place the wax ring on the flange before installing the toilet flange bolts, and make sure it is centered and level. Then insert the bolts into the toilet flange, making sure they are equidistant from the centerline of the flange.
Use a wrench to tighten the nuts onto the bolts, but do not over-tighten. Over-tightening the bolts may crack the porcelain toilet bowl or damage the wax ring seal. Once the bolts are in place, you can carefully install the toilet bowl flange.
If You Liked This Post? So Share It with Your Friends
Suggested Articles: