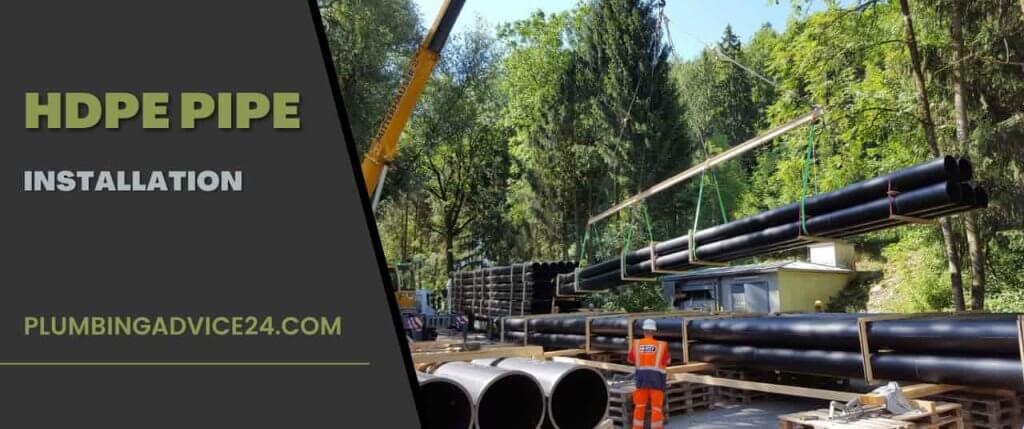
HDPE Pipe Installation and Repair Methods

From fire hydrants to hazardous waste, there is no other system more effective for containing and moving products than HDPE pipes. It is lightweight, resistant to chemicals and moisture, and can last up to 100 years. Best of all, it is a cost-effective control solution that is ideal for a wide range of different industries and applications. Read this entire article for HDPE pipe installation and repair.
How to Install HDPE Pipe?
There are two ways to do HDPE pipe underground installation. One option is to dig a trench to lay the pipe, while an alternative is to use a commercial auger that will drill into the ground and pull the pipe along with it at the same time. The latter is recommended for situations where trenching is not permitted or possibly such as in streets or driveways. This pipe can be installed by second trench installation; this method is simple as it does not require the use of joints.
HDPE Pipe Underground Installation Methode
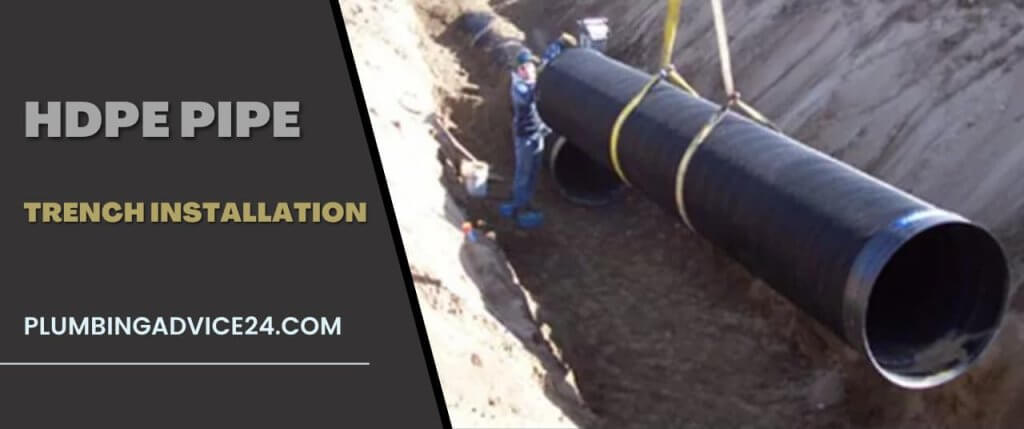
HDPE water pipe installation and HDPE drainage pipe installation are done underground by this method. Trench installation involves digging a trench into which the HDPE pipe is placed, then backfilling after installation. There are several steps in this process.
Follow the steps below for the HDPE trench installation preparation method:
- When constructing a trench, pipe size, surface condition, burial depth, surface load, pipe SDR, trench length, and groundwater elevation will all need to be considered to meet code requirements.
- For unstable trench floors, fix them by dewatering them. However, if this is not possible, you can add crushed rocks. It is important to ensure that the trench floor is smooth and free of rocks, ridges, hollows, and lumps.
- The bottom of the trench should be padded with about four to six inches of tamped bedding material. It should also be free of sand, gravel, or clayey sand.
- HDPE pipe should be placed by hand around 8” in diameter. The equipment should only be used for moving, lifting, and lowering. It should not be dropped, thrown, pushed, or rolled into the trench.
- For angled embedment, use a shovel to cut and throw a crushed stone to place around the pipe. If the material, however, is naturally occurring, such as a mixture of sand and fines, it shall be in lift and shall not exceed eight inches in thickness. After placement, they should be tamped using a mechanical tamper.
- After laying the HDPE pipe, backfilling is the next step to keep the pipe out of line and protect it from external damage, among others. The backfill should be approximately 6 inches below the pipe haunch from the PE pipe. Lifts should be placed evenly on the sides of the pipe while ensuring that there are no large, hard objects hit the pipe. For the final backfill, there should be at least one foot of backfill cover on the pipe before compaction.
Must Read : What Is HDPE Pipe | HDPE Pipe Applications | HDPE Pipe Sizes | HDPE Pipe Price
HDPE Pipe Electrofusion Welding Method
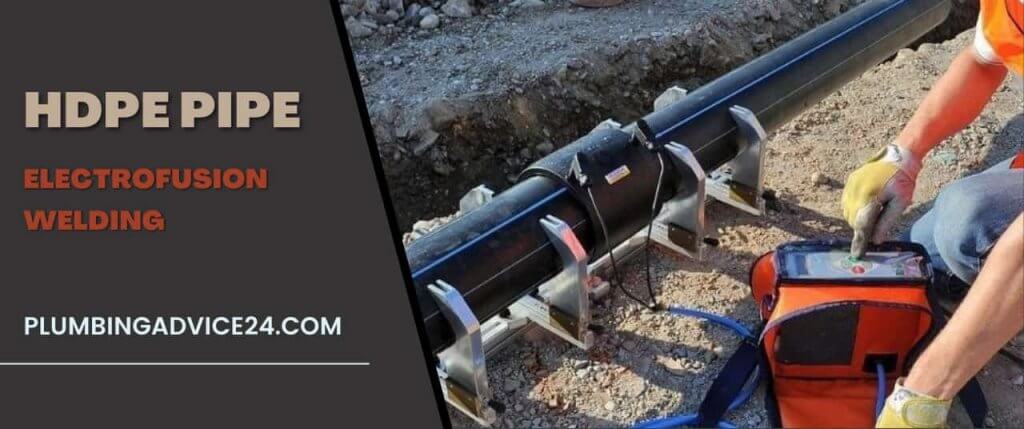
For HDPE electro-fusion welding, HDPE accessories are provided with spigot ends. The spigot ends are provided with fewer irregularities, and the welding sleeve has projections so that they can be accurately spaced.
Follow the steps below for the HDPE pipe electrofusion welding method:
- The HDPE electro-weld sleeve is provided with 2 socket ends that can be welded in a single operation.
- Welding equipment sends current through a resistance wire into an electro-weld socket for a set period of time. Both electro-welded sockets are welded at the same time.
- The electro-weld socket has stops on the inside. The socket has two contact pins on the outside for the connection of welding equipment.
- Two welding indicators appear during and after the welding operation. This indicates that welding has been reached and welding pressure has been applied.
- Connector cables from welding equipment should be connected to the electro-weld socket.
- This will illuminate the “Connection” indicator lamp.
- Press the start button. The welding indicator lamp will illuminate. Once the welding time is over, the lamp is automatically extinguished, and the current supply is stopped.
- Check weld indicators. They should have protruded by about 2mm.
HDPE Butt Fusion Welding Methode
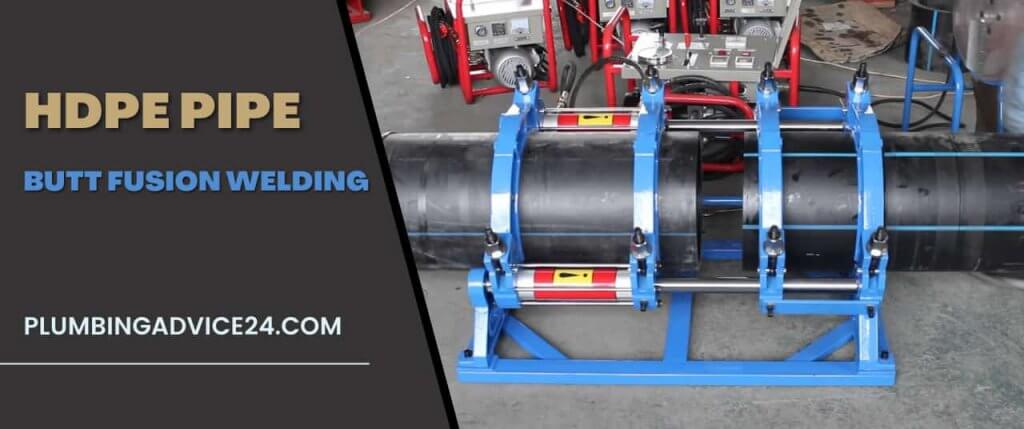
In HDPE butt welding (pipes 75 mm and smaller), both pipe ends are placed against a hot plate at constant temperature and pressure. The plastic pipe ends are now pressed together so that the molecules of the material are transferred between them.
Follow the steps below for the HDPE Butt Fusion Welding or HDPE pipe welding hot plate method:
- The temperature of the hot plate should be 210 C.
- The hot plate should be clean and free of grease.
- Ensure that the two pipe brackets and the two pipe supports are correctly aligned.
- Both pipe clamps must be adjusted so that they hold the pipe tightly enough to withstand the force of the welding process.
- Briefly press the end of the pipe against the hot plate with high pressure. Continue heating at very low pressure until a 1 mm top stand is formed.
- Quickly remove the hot plate and gradually increase the welding pressure.
- Keep the welding pressure constant and allow the weld to cool.
- Remove the joint and inspect the welds. An irregular weld seam should be rejected.
Must Read : What Is Plumbing Pipe | 22 Different Types of Plumbing pipes
HDPE Pipe Liner Installation
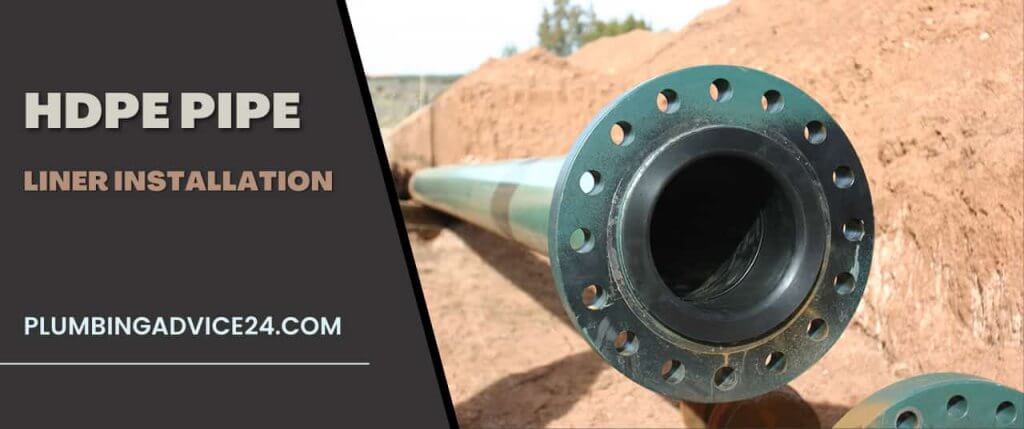
Compression fit, also known as swage lining in the past, is a trenchless pipe lining method. Compression fit HDPE pipe lining technology refers to HDPE pipe with an outside diameter larger than the inside of the host pipe for renewal. After the HDPE butt is fused to match the pull distance, the pipe is pulled through the reduction die immediately before entering the host pipe. This temporarily lowers the HDPE pipe below the ID of the host pipe, allowing it to be inserted.
While the towing load stresses the HDPE during pulling, the pipe remains in its reduced size. HDPE remains fully elastic during the reduction and installation process. After installation, the pulling load is removed. The HDPE pipe expands until it is stopped by the inside diameter of the host pipe. Effectively a natural ‘tight’ or ‘compression fit is accepted as replacing the existing failed pipeline with the composite pipe.
Must Read : How to Install Copper Pipes | How to Repair Copper Pipe | 3Ways to Repair Copper Pipes
HDPE Drainage Pipe Installation
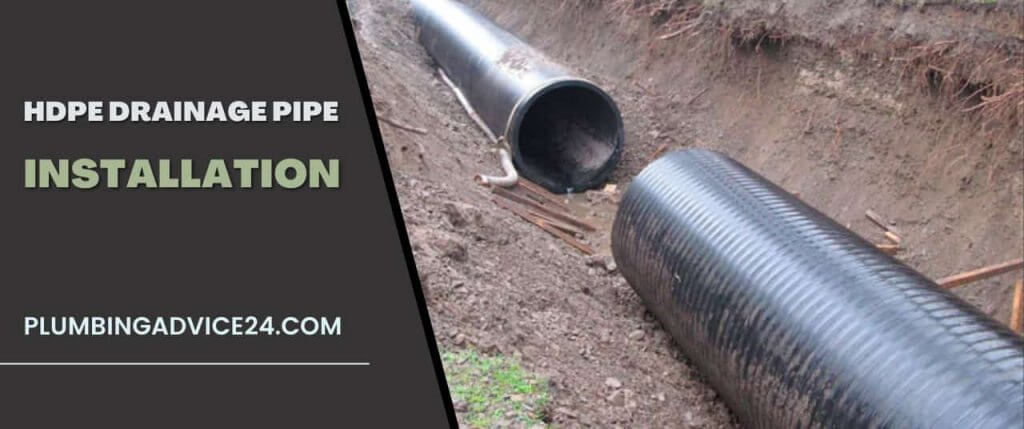 Trench preparation for laying HDPE corrugated pipe and HDPE drain pipe is similar to other pipe materials. Your trench should be wide enough for placement and compaction of backfill material on either side of the pipe, with space for backfill material on either side increasing with the size of the pipe. You can refer to the pocket installation guide to get a more precise trench width. HDPE Pipe Trench Installation Method is mentioned above, using which HDPE drain pipe is installed.
Must Read : What Is a Sewer Line | Types of Sewer Pipes | Best Sewer Line Insurance Company
How to Repair HDPE Pipe?
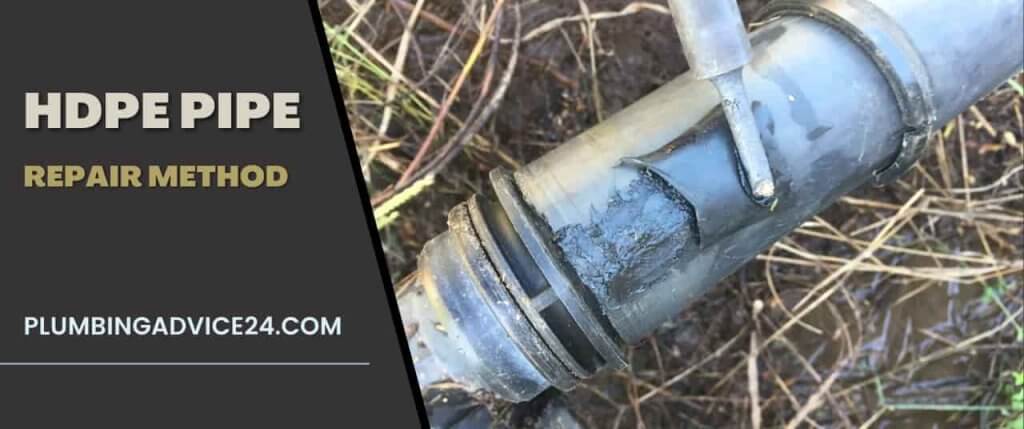
Assess the damage of high-density polyethylene (HDPE). If the plastic breaks, measure the length. If there are holes, measure the diameter. Share a piece of polyethylene from the garbage. Most HDPE pipeline leaks can be repaired very easily and quickly.
Quickly apply tape, electrical tape, epoxy resin putty, or glass fiber resin to secure leaky HDPE pipes. The end of the crack is then located and drilled to ensure that the crack does not propagate after the weld is strengthened.
Drill one guide hole per inch on either side of the crack, 1 to 4 inches from the crack. For one hole, drill a 1-inch / 4-inch guide hole from the perimeter. Align the patch you draw from the scrap piece to the crack or hole.
HDPE Pipe Repair Methode:
- Rough up the area of the damaged HDPE pipe with sandpaper.
- Drill a hole at each end of the crack so that internal pressure does not widen the crack.
- Clean the damaged and surrounding area with cleaner, and dry thoroughly. Apply Poly Prep Adhesion Promoter to the area to be bonded to the pipe.
- Spray Activator/Accelerator (AA) on the prep area. Allow the AA to dry.
- Apply SI Blue to the tack patch with continuous circles except for diagonal corners. Pay special attention to where the adhesive reaches the edges.
- Hold diagonal corners on the tack patch, and apply tension.
- Press the tack patch onto the HDPE in the problem area.
- Use a glue squeegee to apply firm pressure to the tack patch from the center out.
- Attach the diagonal edge to the HDPE with SI blue spray with AA.
- Apply a SI Blue bead to the tack patch’s perimeter. Spray with AA.
- Check that the HDPE pipe leak repair you have done is done properly.
Must Read : What Is Plumbing Pipe Materials | What Is Used to Make Plumbing Pipes
How to Join HDPE Pipe?
Hdpe Pipe is joined by trench installation, Electrofusion Welding, or Butt Welding.
How Is HDPE Pipe Most Commonly Joined?
The standard method of fusing HDPE pipes is welding. This can be done in two ways: electrofusion welding and butt welding. Butt welding is the most common method for HDPE pipe joints.
What Fittings Are Used with HDPE Pipe?
HDPE transition fittings and BSP threaded adapter fittings are used to connect HDPE pipes to other types of pipes.
Can HDPE Pipe Be Repaired?
Yes, the HDPE pipe can be repaired. Following are the steps for HDPE pipe repair.
- Rough up the area of the damaged HDPE pipe with sandpaper.
- Drill a hole at each end of the crack so that internal pressure does not widen the crack.
- Clean the damaged and surrounding area with cleaner, and dry thoroughly. Apply Poly Prep Adhesion Promoter to the area to be bonded to the pipe.
- Spray Activator/Accelerator (AA) on the prep area. Allow the AA to dry.
- Apply SI Blue to the tack patch with continuous circles except for diagonal corners. Pay special attention to where the adhesive reaches the edges.
- Hold diagonal corners on the tack patch, and apply tension.
- Press the tack patch onto the HDPE in the problem area.
- Use a glue squeegee to apply firm pressure to the tack patch from the center out.
- Attach the diagonal edge to the HDPE with SI blue spray with AA.
What Glue Works on HDPE?
Cyanoacrylate adhesive can be used along with primer Permabond POP. Cyanoacrylates set almost instantly and provide good glue to HDPE, provided the surface is pre-treated with Permabond POP primer. The bonds have good resistance to non-polar solvents but do not fair as well with polar solvents.
What Epoxy Works on HDPE?
LOCTITE Epoxy Five-Minute Instant Mix. This is the first of the top three HDPE adhesives, mainly because it is easy to use and it works extremely well when it comes to bonding HDPE surfaces together.
How Do You Glue HDPE Pipe Together?
PE Fusion is a modified acrylic, high-strength adhesive designed for coupling and splicing HDPE pipe lengths to one another and – uniquely among glues of its type – to other materials, such as PVC, aluminum, steel, or fiberglass.
Does HDPE Crack Easily?
HDPE is a crystalline material, and when high tensile stress is applied, the material will stretch and yield before ductile failure, but at low tensile stress, the material will fail suddenly with a smooth break typical of brittle failure. This is known as environmental stress cracking.
Can HDPE Be Drilled?
HDPE sheet is easy to drill with both standard woodworking and steelworking drill bits. Spade bits work well for larger holes. For larger holes, a hole saw works; however, they plug up rather quickly, so it should be drilled using multiple depths with cleaning the shavings out in between.
What Is the Best Way to Cut HDPE?
Carbide-tipped tools are best as they are long-lasting and achieve high productivity rates on HDPE. High-speed steel is adequate, also. Fast-running bands and circular saws are suitable for cutting HDPE. The cut surface can be smooth, and a good finish can result when the teeth are lightly set.
How Long Will HDPE Last Underground?
HDPE geomembrane can have a service life (50% degradation) of over 400 years. Under the conditions described, it is reasonable to expect that the service life of the CTF lining system is for several centuries or more.
If You Liked This Post? So Share It with Your Friends
Suggested Articles :
- What Is a PVC Pipe | How to Measure PVC Pipe Size | PVC Pipe Installation Cost
- How to Repair PVC Pipe | How to Replace PVC Pipe
- How to Install PEX Pipe | Repair PEX Pipe | Kink Repair in PEX Pipe | Pinhole Leak in PEX Pipe
- How to Install ABS Pipe and Fitting | How to Repair ABS Pipe | ABS Pipe Schedule 40 and Schedule 80
- Types of Metal Pipes | Seamless Vs Welded Pipes
- How to Install Steel Pipe | How to Repair Steel Pipe | How to Replace a Steel Water Pipe
- Install CPVC Pipe | How to CPVC Leak Repair | CPVC Joint Leak Repair | Causes of CPVC Pipe Failure
- Installation of uPVC Pipe by PVC Pipe Glue | Installation of uPVC Pipe by Rubber Ring Joint | How to Repair uPVC Pipe