DIY Pool Steps: Upgrade Your Pool with Style
Creating your own DIY pool steps is an excellent way to enhance the functionality and aesthetic appeal of your swimming pool.
Whether you’re looking to add a touch of personal style or improve safety for family and friends, building DIY pool steps can be a rewarding project.
This guide provides a comprehensive overview of the materials, design considerations, and step-by-step instructions needed to construct durable and stylish pool steps yourself.
Perfect for both beginners and seasoned DIY enthusiasts, this article will help you navigate the process of adding custom-made steps to either an above-ground or in-ground pool, ensuring every swim is a safe and beautiful experience.
Choosing the Right Materials for DIY Pool Steps:
When building DIY pool steps, selecting the appropriate materials is crucial for ensuring durability, safety, and seamless aesthetic integration with your pool.
Here’s a breakdown of the most common materials used in pool step construction, along with their benefits and considerations:
1. Wood:

Wood is a popular choice for above-ground pools due to its versatility and natural appearance. It’s relatively easy to work with and can be cut to any size or shape.
However, wood requires regular maintenance to prevent water damage, rot, and decay.
It’s essential to choose treated or hardwood varieties and apply a waterproof sealant.
2. Metal:

Metals like aluminum and stainless steel are excellent options for both above-ground and in-ground pools.
They are durable, rust-resistant when properly coated, and offer a sleek, modern look.
Metal steps can handle heavy loads and resist the harsh chemicals found in pool water. Make sure the metal is finished with a non-corrosive coating to enhance longevity.
3. Concrete:

Concrete steps are a permanent, durable option for in-ground pools.
They can be poured to fit any design and are the most stable type of pool steps. Concrete is also highly customizable; it can be painted, stained, or finished with tiles to match your pool’s design.
However, concrete installation is labor-intensive and may require professional help.
4. PVC and Plastic:
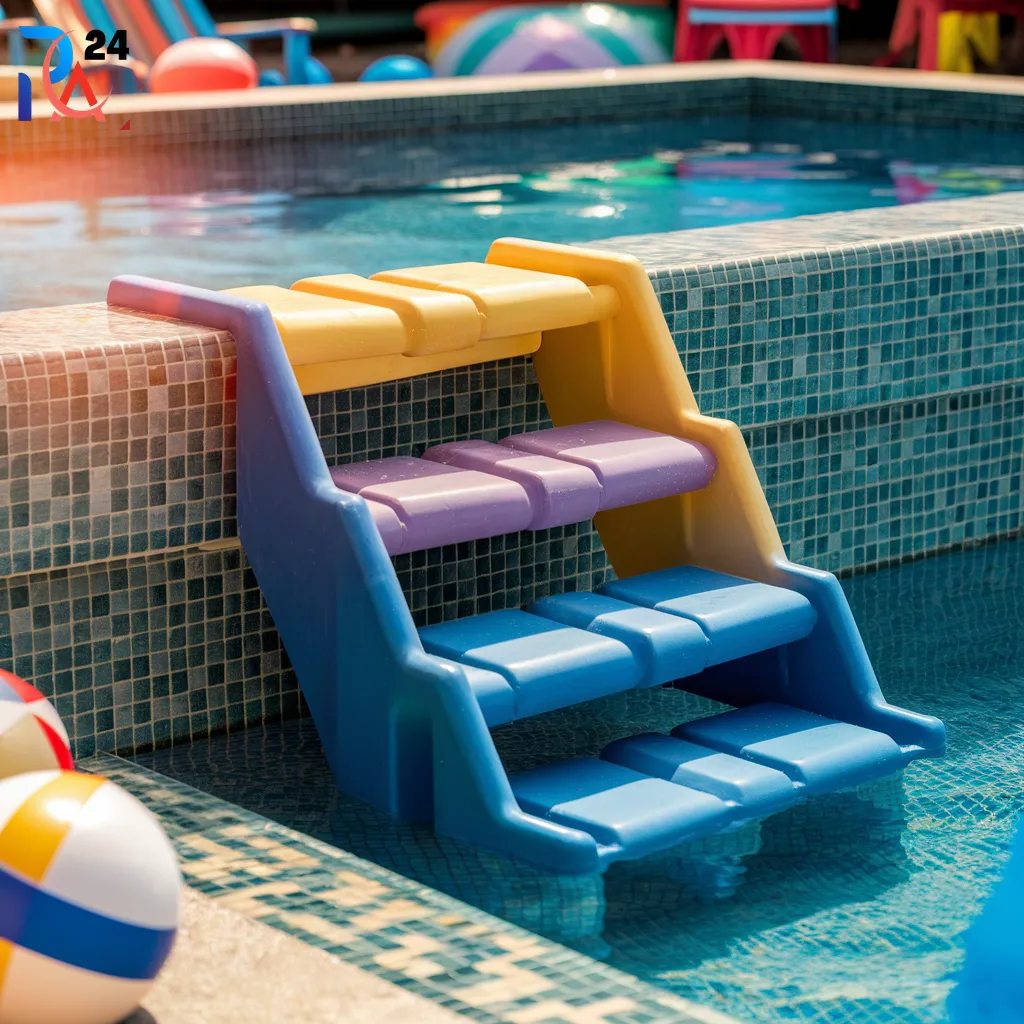
For those seeking a more cost-effective and lightweight option, PVC and heavy-duty plastics can be suitable.
These materials are resistant to chlorine and saltwater and do not require extensive maintenance.
They can be prefabricated in various styles and colors, but they may not offer the same level of durability and stability as wood, metal, or concrete.
5. Composite Materials:

Composite materials, which are a blend of plastic and wood fibers, combine the benefits of both materials.
They are durable, resistant to moisture and decay, and require little maintenance.
Composites can also be textured to prevent slipping, making them safe for wet environments.
Design and Planning for DIY Pool Steps:
Designing and planning are critical stages in creating DIY pool steps, ensuring they meet both functional requirements and aesthetic preferences.
Here’s a comprehensive guide to help you through the process.
Step 1: Assessing Your Needs
Begin by evaluating your pool’s specific needs. Consider who will be using the pool steps (e.g., children, elderly) and what functionality is most important (e.g., safety, accessibility).
This assessment will guide your design choices, such as the width of the steps and the type of handrails needed.
Step 2: Choosing a Design
Decide on a design that complements your pool and surrounding area. Consider the following designs:
- Straight Steps: Simple and functional, suitable for most pools.
- Curved Steps: Offer a more aesthetic appeal and can fit better with certain pool shapes.
- Corner Steps: Efficient use of space, ideal for pools with limited size.
Each design has its pros and cons, depending on your space and style preferences.
Step 3: Determining Dimensions
Proper dimensions are crucial for safety and comfort. Standard dimensions to consider include:
- Width: At least 36 inches for comfortable access.
- Depth: Each step should be around 10-12 inches deep.
- Height: A riser height of about 6-7 inches is typical, but this may need to be adjusted based on the users’ needs.
Step 4: Material Layout
Once you have your design and dimensions, layout the materials needed. This includes not only the primary material for the steps but also any additional materials for non-slip surfaces, handrails, and decorative elements.
Step 5: Safety Features
Incorporate safety features into your design. Options include:
- Non-Slip Surfaces: Essential for all step surfaces to prevent accidents.
- Handrails: Strongly recommended, especially for deep or high steps.
- Visibility Markers: Consider contrasting colors on the edge of each step to enhance visibility.
Step 6: Aesthetic Enhancements
Consider how to make your pool steps not only functional but also visually appealing. Some ideas include:
- Integrated Lighting: LED lights can be installed within the steps for night-time visibility and aesthetic appeal.
- Decorative Tiles or Stamps on Concrete: Add a unique touch with decorative elements.
- Color Coordination: Match or complement the color of your pool lining or surrounding deck area.
Step 7: Building Regulations and Permits
Before construction, check local building codes and obtain any necessary permits. This ensures that your pool steps are up to standard and legally compliant.
Construction Steps for DIY Pool Steps:
Constructing your own pool steps requires careful planning and execution to ensure they are safe, durable, and aesthetically pleasing.
Here’s a detailed guide on how to proceed with the construction phase of your DIY pool steps project.
Step 1: Gather Materials and Tools
Before starting, ensure you have all the necessary materials and tools. This includes your chosen construction material (wood, metal, concrete, etc.), screws or bolts, non-slip surfacing materials, a saw for cutting, measuring tape, drill, and any other specific tools required for your material choice.
Step 2: Prepare the Site
Clear the area where the steps will be installed. For in-ground pools, this might involve some excavation and leveling. For above-ground pools, ensure the ground is stable and level where the steps will be placed.
Step 3: Build the Frame
- Wood/Metal Steps: Start by constructing a frame to support the steps. Use corrosion-resistant screws or bolts for assembling the frame. Ensure all joints are secure and stable.
- Concrete Steps: Create a wooden form to mold the concrete into your desired shape. The form should be sturdy and well-supported to hold the concrete until it cures.
Step 4: Install the Treads
- Wood/Metal: Attach the treads to the frame, ensuring they are spaced evenly. Each tread should be securely fastened to withstand regular use.
- Concrete: Pour the concrete into the form, smoothing out the top surface of each step as you go. Allow the concrete to partially set before adding any decorative textures or stamps.
Step 5: Apply Non-Slip Surfaces
Once the basic structure of the steps is in place, apply a non-slip surface to each tread. This could be non-slip tape for wood or metal steps, or a brushed finish or slip-resistant additive mixed into the concrete for concrete steps.
Step 6: Install Safety Features
If you plan to add handrails:
- Wood/Metal: Attach the railings to the sides of the steps using brackets and screws.
- Concrete: Install the railing posts before pouring the concrete, ensuring they are securely anchored.
Step 7: Finishing Touches
- Wood: Apply a waterproof sealer to protect the wood from moisture and decay.
- Metal: Apply a rust-resistant paint or finish to enhance durability.
- Concrete: Once fully cured, remove the forms and clean up any rough edges. Seal the concrete to protect it from moisture and chemicals.
Step 8: Final Inspection
Once construction is complete, inspect the steps thoroughly. Ensure all parts are secure, the surface is even, and there are no sharp edges or loose materials. Test the stability of the steps by applying weight to each step and railing.
Customization Options for DIY Pool Steps
Customizing your DIY pool steps not only enhances their functionality but also adds a unique flair that can transform your pool area into a more attractive and enjoyable space. Here are several customization options to consider that can cater to both practical needs and aesthetic preferences:
- Material Finishes: Choose finishes that complement your pool area, such as waterproof paint for wood or a high-gloss sealant for concrete.
- Handrails: Customize handrails with different materials or designs. Consider ergonomic designs for enhanced grip and safety.
- Lighting: Integrate LED lighting within or around the steps for improved visibility and aesthetics. Consider solar-powered lights for energy efficiency.
- Decorative Elements: Embed tiles or colorful stones into concrete steps or add decorative panels to wood or metal frames to enhance visual interest.
- Safety Features: Install visible, non-slip edges on each step and consider adding color contrast for better step delineation.
Maintenance and Troubleshooting for DIY Pool Steps
Maintaining your DIY pool steps is essential to ensure their longevity, safety, and continued aesthetic appeal. Here’s a structured approach to help you keep your pool steps in top condition, along with some common troubleshooting tips.
Regular Maintenance Tasks:
1. Cleaning:
-
- Regularly sweep or hose down the steps to remove debris, leaves, and dirt.
- For more thorough cleaning, especially for non-slip surfaces, use a mild detergent mixed with water and a soft brush to scrub the steps gently.
2. Inspection:
-
- Conduct a routine inspection every few months to check for structural integrity. Look for any signs of wear, such as loose parts, cracks, or erosion.
- Check all fasteners and connections, especially after severe weather conditions, to ensure they remain tight and secure.
3. Protective Treatments:
-
- For wood steps, reapply a water-repellent finish or sealant annually to prevent water damage and decay.
- For metal steps, check for rust or corrosion and touch up with rust-proof paint or replace parts if necessary.
- Concrete steps should be sealed to prevent moisture penetration and to protect against freeze-thaw damage in colder climates.
4. Winter Care:
-
- If applicable, consider covering the steps during the winter months to protect them from snow and ice.
- For pools that are not in use during winter, ensure that steps are dry and clean before covering to prevent mold and mildew growth.
Troubleshooting Common Issues:
1. Slippery Surfaces:
-
- Problem: Steps become slippery when wet, posing a safety hazard.
- Solution: Apply anti-slip tape or repaint with a non-slip paint product. Regularly check the condition of these surfaces as they may wear out and need replacement or reapplication.
2. Loose Handrails or Steps:
-
- Problem: Handrails or step treads loosen over time, which can lead to instability.
- Solution: Tighten all bolts and screws. If the material is worn out, consider replacing it to ensure a secure fit.
3. Cracks in Concrete Steps:
-
- Problem: Small cracks can develop in concrete steps due to weather changes or settling.
- Solution: Clean out the cracks and fill them with a concrete patching compound. For larger cracks, seek professional advice to determine if there’s a deeper structural issue.
4. Wood Rot or Insect Damage:
-
- Problem: Wooden steps are susceptible to rot or insect infestations.
- Solution: Replace rotted or infested wood immediately to prevent further damage. Consider treating the wood with a borate-based product for protection against rot and insects before sealing.
5. Corrosion in Metal Steps:
-
- Problem: Exposure to pool chemicals and moisture can lead to corrosion.
- Solution: Sand the affected areas lightly and apply a primer and paint designed for metal and suitable for use in high-moisture environments. Regularly check for new signs of rust or corrosion and address them promptly.
Preventive Measures:
- Routine Checks: Set a maintenance schedule and stick to it. Regular checks can help you catch issues before they become major problems.
- Quality Materials: Use high-quality materials and protective finishes from the start to reduce maintenance needs and extend the lifespan of your pool steps.
- User Guidelines: Encourage safe use of the steps, such as no jumping or bouncing on them, which can help prevent premature wear and tear.
Useful Articles:-
- Small Pool Deck Ideas: Inspiration for a Mini Oasis
- Front Yard Landscape Ideas: Creating Spaces for Outdoor Living
- Backyard Landscaping Ideas: Creating Your Outdoor Sanctuary
- Top Outdoor Kitchen Ideas to Elevate Your Backyard
- Top Fire Pit Garden Ideas for Every Backyard
Conclusion:-
Building your own pool steps is a project that not only adds value to your pool but also enhances its safety and usability. With the right tools, materials, and a bit of creativity, you can construct custom steps that fit perfectly with your home’s outdoor décor. Remember, safety is paramount, so take your time to design, build, and maintain your steps carefully.
By following this guide, you will be well on your way to creating a functional and attractive addition to your pool that you can be proud of. Dive into this project, and enjoy the rewards of your DIY skills every time you step into your pool!